Configuration
Amazing Proxmox Repository
https://github.com/tteck/Proxmox
Updates Repository
For regular updates and to avoid errors set the updates repository from the enterprise proxmox repo (subscription required) to the pve-no-subscription repo.
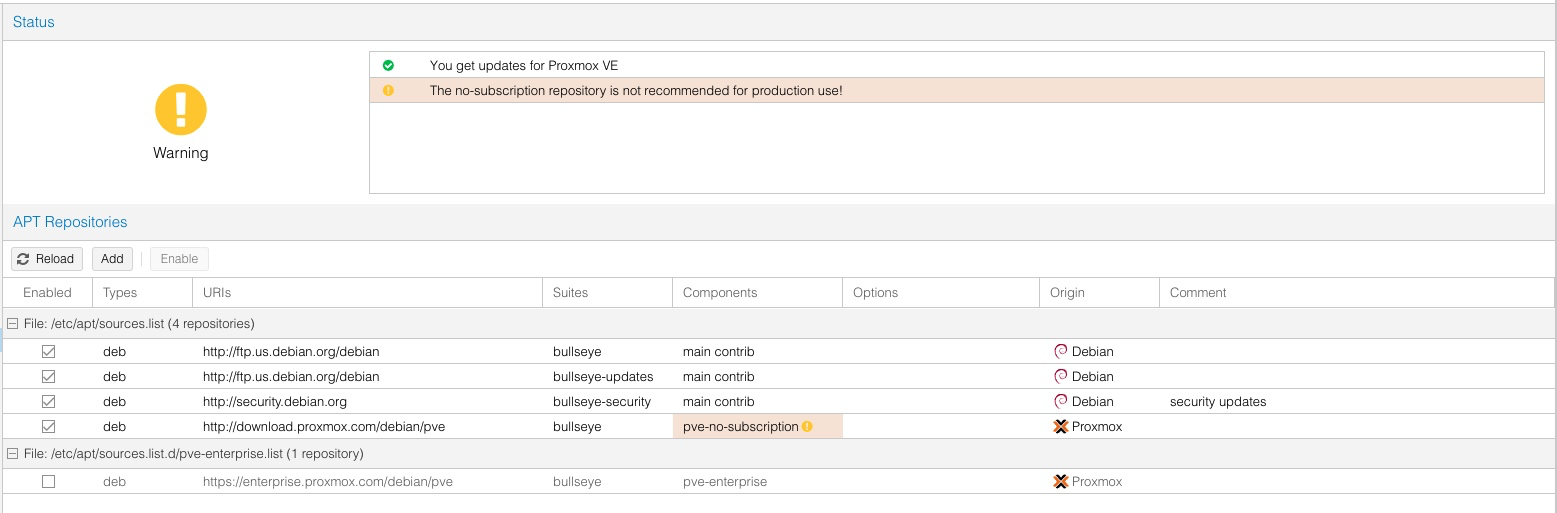
pve node > updates > repositories- disable the enterprise repo
[Add]pve-no-subscription- run
apt-get update; apt dist-upgrade; reboot
Enable IOMMU
Enable iommu so VM's can access hardware not made for virtualization (GPU's etc.)
- you can do this but updating the
/etc/default/grubfile- change
GRUB_CMDLINE_LINUX_ DEFAULT="quiet" - to:
GRUB_CMDLINE LINUX DEFAULT="quiet intel iommu=on"
- change
- Then run
update-grub - Then edit
/etc/modulesAdd these 4 lines to it: -
`vfio` `vfio_iommu_typel` `vfio_pci` `vfio_virqfd` - Then run
update-initramfs -u -k all - reboot
Make Proxmox VLAN aware
- go to
pve node > System > Network - "Edit" your Linux bridge
- check the box for
VLAN aware: - Click
Apply Configuration
This will update /etc/network/interfaces with new settings and where it says bridge-vids you can change the default 2-4094 to be a single number for the VLAN of the server, or do that for individual virtual machines
Setup Linux Bridge for Virtual Machines Separate from management Layer
pve node > System > Network > Create > Linux Bondbond0- List all the bridge ports in a space separated list except the 1 used for the management layer
- choose 3ad mode for LACP
- Add Comment
- after finished creating modify switch side settings for LACP for those ports
Make Network Bridge for Virtual Machines
pve node > System > Network > Create > Linux Bridgevmbr1is fine- Give it a IPV4 address like
10.10.10.0/24 - make it
VLAN aware: - List all the bridge ports in a space separated list (the LACP
bond0you made) - Add Comment
Setup NFS for backups
- You need to have the Network File System share already setup so Fafnir needs to already be setup and mounted to the proxmox instance?
Datacenter node > storage > add > nfsID==> "Backups"- Server IPV4 address (address to Fafnir?)
- Export
/mnt/storage <++>
Schedule Backups
Datacenter node > backup > add- Select Node to backup
- Select storage share to send backups to
- Schedule Backups
- Email notification Settings
- Compression level (ZSTD)
- mode == snapshot
- test it
- make a backup immediately
Download Windows VirtIO drivers
- Go To This page
- Click the link under
Installationfor downloading latest stable release - upload iso to proxmox iso's in
local > ISO images > Upload
Configure Email notifications
Change /etc/postfix/main.cf to include/change these lines:
relayhost = [smtp.gmail.com]:587
smtp_use_tls = yes
smtp_sasl_auth_enable = yes
smtp_sasl_security_options = noanonymous
smtp_sasl_password_maps = hash:/etc/postfix/sasl_passwd
smtp_tls_CAfile = /etc/ssl/certs/ca-certificates.crt

#mydestination = $myhostname, localhost.$mydomain, localhost
Be sure there are no dupes as the main.cf may have smtp_sasl_security_options = {} , and relayhost = {}. Just delete or comment those lines.
Create an /etc/postfix/sasl_passwd file with:
[smtp.gmail.com]:587 testmehere@gmail.com:PASSWD
run
chmod 600 /etc/postfix/sasl_passwd
postmap /etc/postfix/sasl_passwd
install for passwd support:
apt-get install libsasl2-modules
Restart service:
systemctl restart postfix.service
Test:
echo "Test mail from postfix" | mail -s "Test Postfix" test@test.com
Test from PVE:
echo "test" | /usr/bin/pvemailforward
Setup port forwarding for RDP to windows VM's and make VM's visible on the internal network:
- Start a shell from the web console
- edit
/etc/network/interfaces - make it look like:
auto vmbr1
iface vmbr1 inet static
        address 10.1.10.0/24
        bridge-ports bond0
        bridge-stp off
        bridge-fd 0
        bridge-vlan-aware yes
        bridge-vids 20
        post-up echo 1 > /proc/sys/net/ipv4/ip_forward
        post-up iptables -t nat -A POSTROUTING -s '192.168.0.0/24' -o vmbr0 -j MASQUERADE
        post-down iptables -t nat -D POSTROUTING -s '192.168.0.0/24' -o vmbr0 -j MASQUERADE
        iptables -t nat -A PREROUTING -i bond0 -p tcp --dport 13389 -j DNAT --to 192.168.3.15:3389
#VM Net
Setup iperf3 on the server
apt-get install iperf3
In the ~/.profile file, add this line:
iperf3 -s &
this will make it so upon server startup iperf3 will be run as an independant process that can can gather data from.
By default it listens on port 5021
Backlinks